There are great things happening on all fronts at the moment, Microsoft is taking a major leap with the Windows platform, EPiServer has grown up to become a very mature CMS and the .NET platform is growing as ever before. This tutorial is divided in two sections
- Setting up Windows Server and Visual Studio
- Setting up EPiServer 8 from scratch
Setting up Windows Server and Visual Studio
Personal reflection: Run your development machines virtual or not at all, this is not an option anymore. If your boss or customer doesn't like the fee of VMware Hyper-V is included in Windows 8 and newer. If you don't have Windows 8 or 10 it may be a good time looking for a new job since you don't want to work on 6+ years old platforms, especially if you aren't allowed to purchase solid virtualization software. If none of this applies to you or you still like your budget and Windows 7 computer have a look at VirtualBox, it'll do.
Installing Windows Server
Anyhow, set up a development server by your standards. I'm using Hyper-V assigning 4 cores and 8 gig ram, all on SSD as well. Start up the machine and boot on the Server2016 iso.
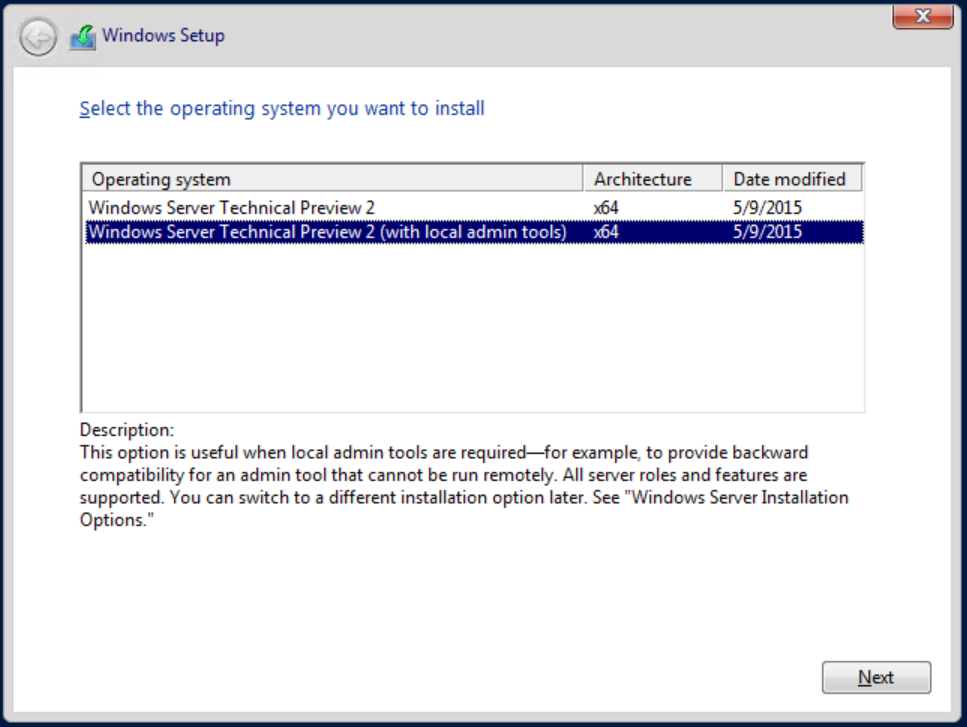
Select the option of your preference, since this is a development box the local admin tools are recommended, if you don't add them here they can be installed afterwards. Notice that this will not add a GUI to Windows Server 2016, this we will have to add later using PowerShell. Allow the installation to run to the end.

What's kind of sorcery is this? (Welcome to the future of Windows!) As an old-timer I love this view but it is however not very practical for normal development. That's why I'll add a gui. First things first, in my case it is important to change the server name and to join a domain. Use the sconfig command.

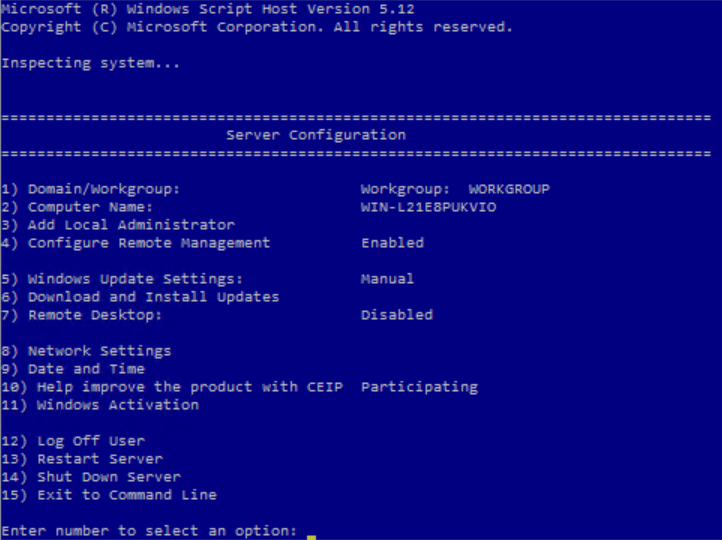 This setup is strictly up to you but I'd recommend you to
- Change the computer name (requires reboot)
- Enable remote desktop it this is a Hyper-V server
- Activate Windows Update.
In my case this is where I join my development domain.
Install the GUI
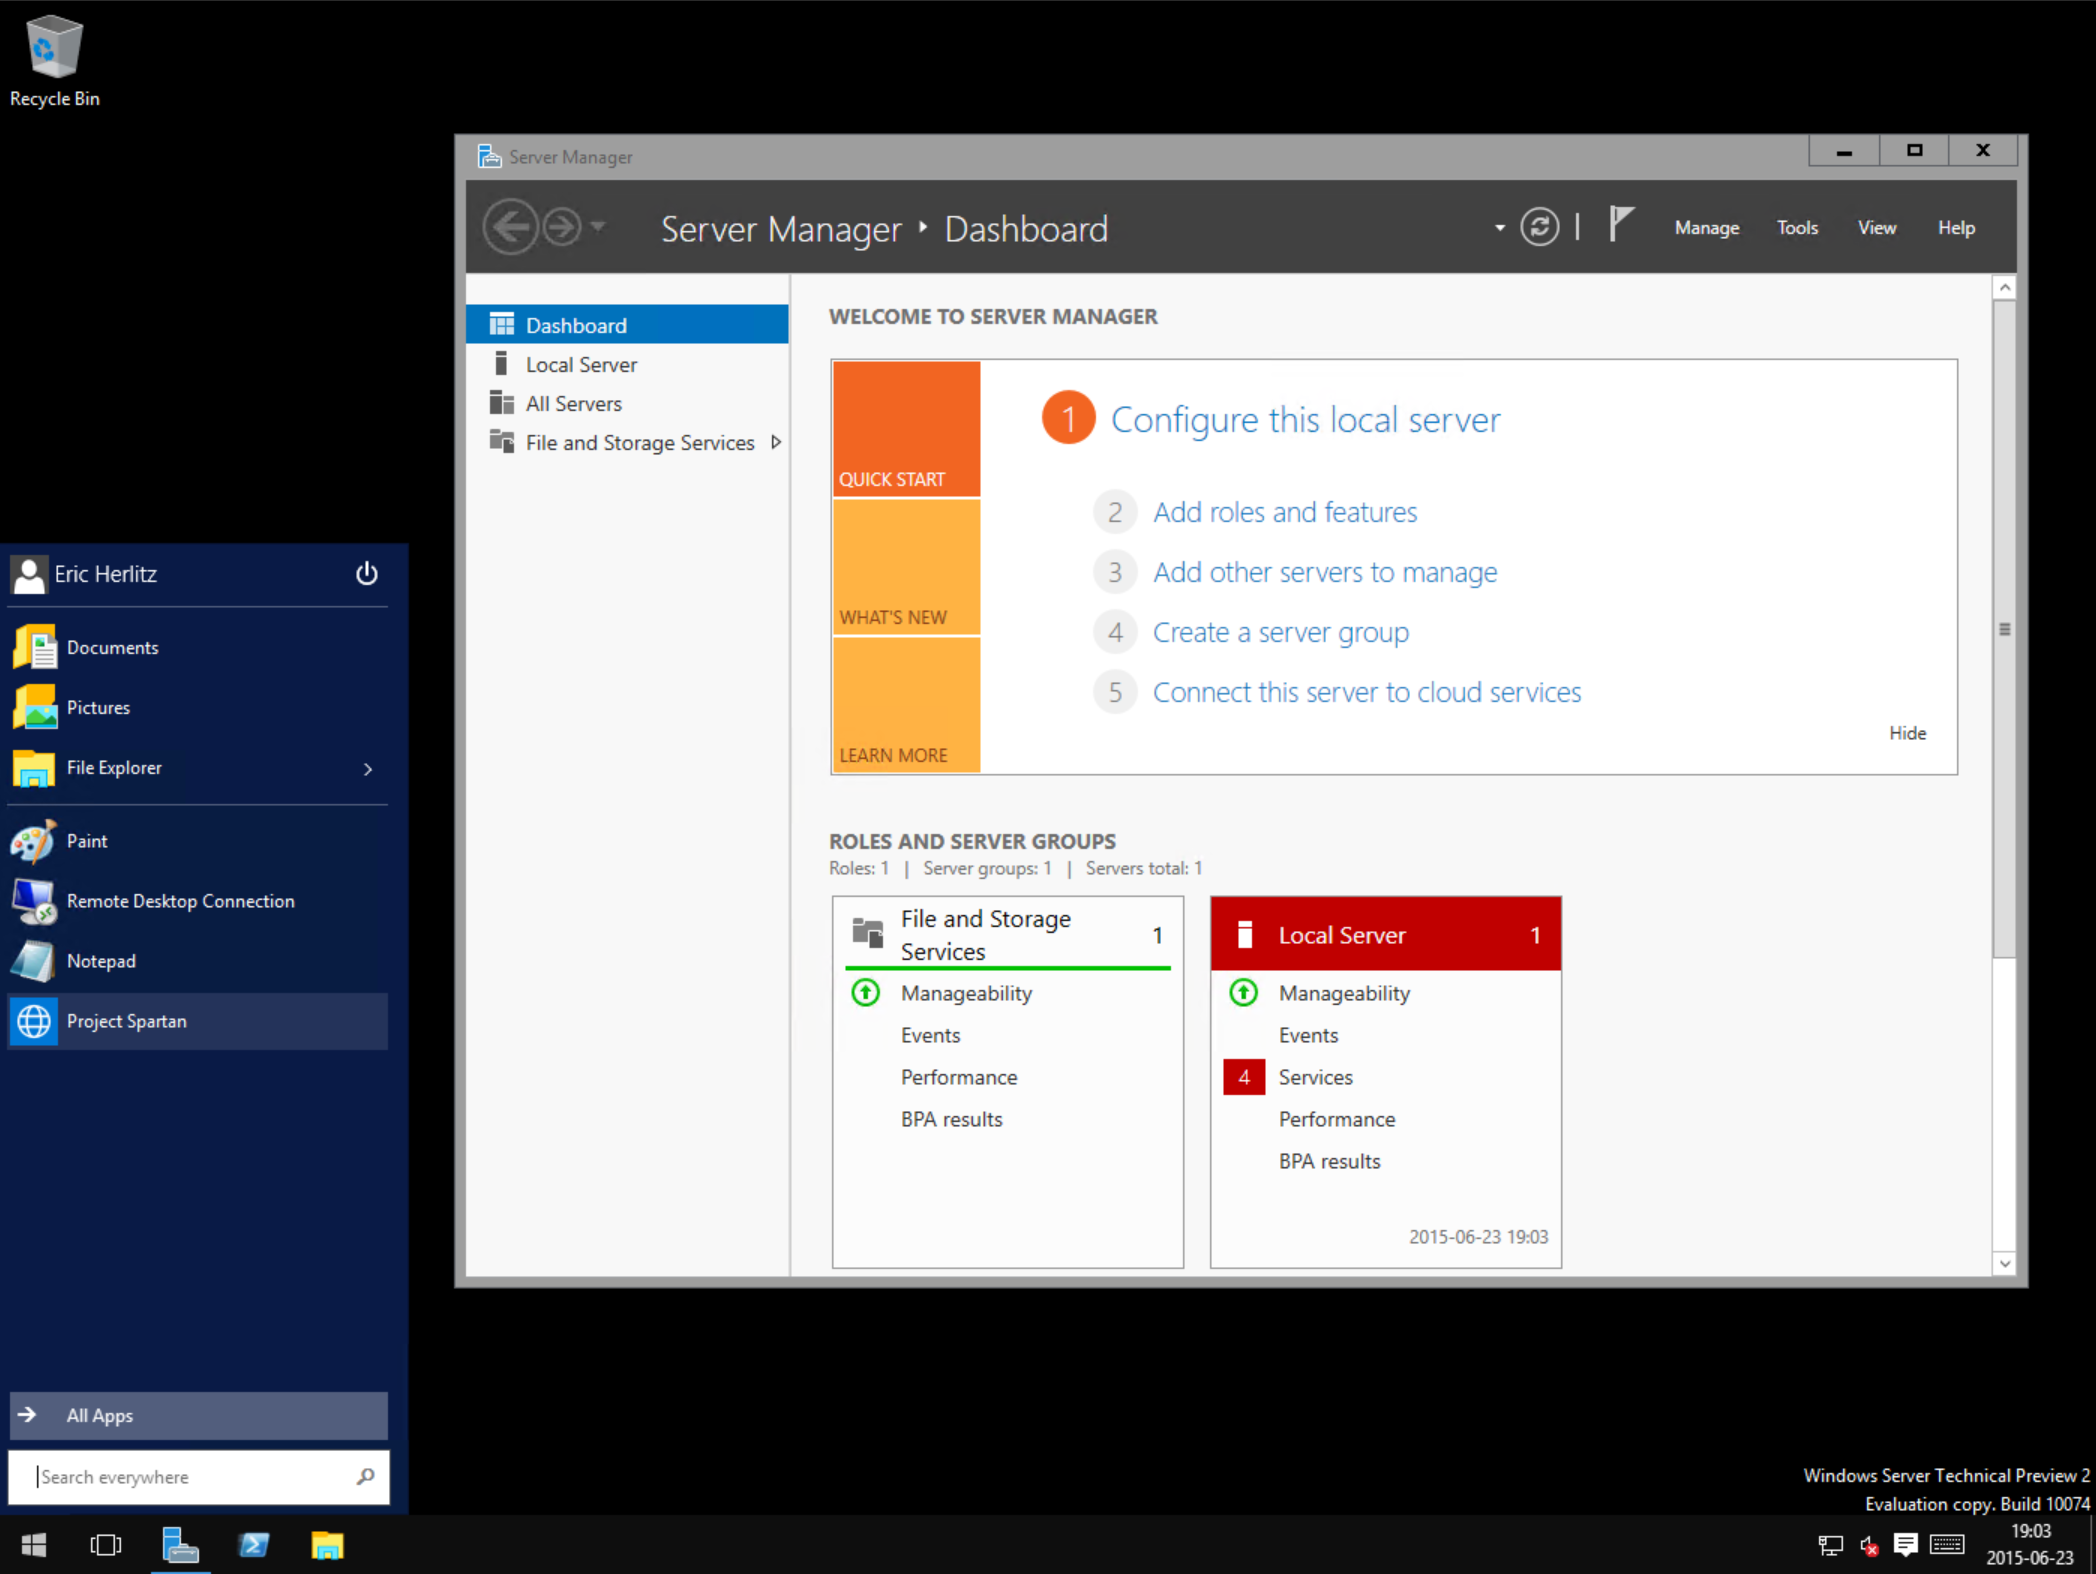
As I said the traditional Windows GUI is not yet installed, to add it user PowerShell and the command Install-WindowsFeature Server-Gui-Shell and restart the computer when done. This installation may take several minutes.


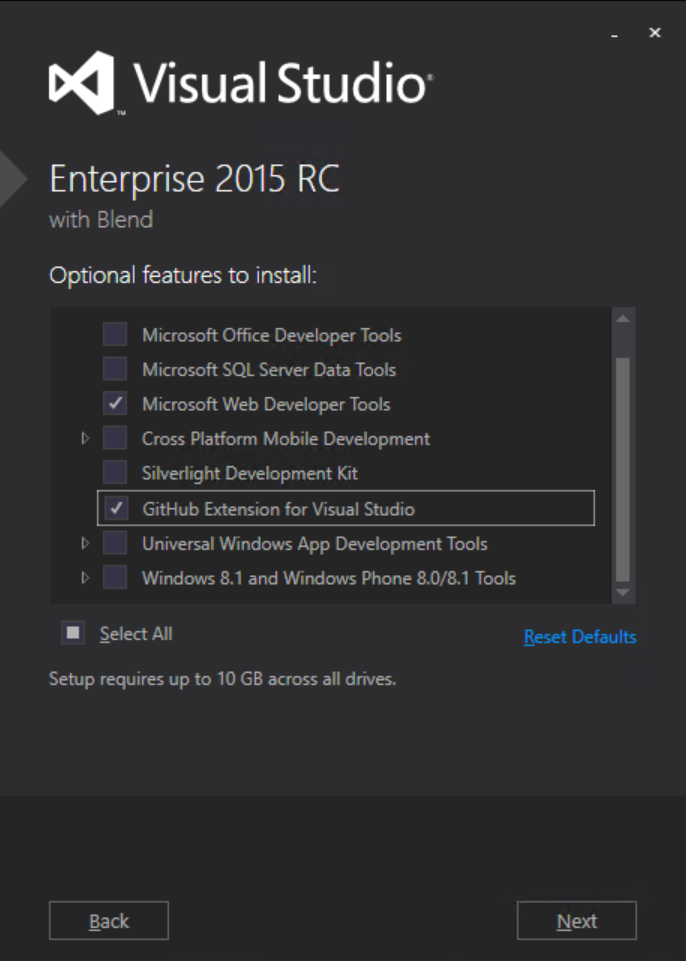
Installing Visual Studio
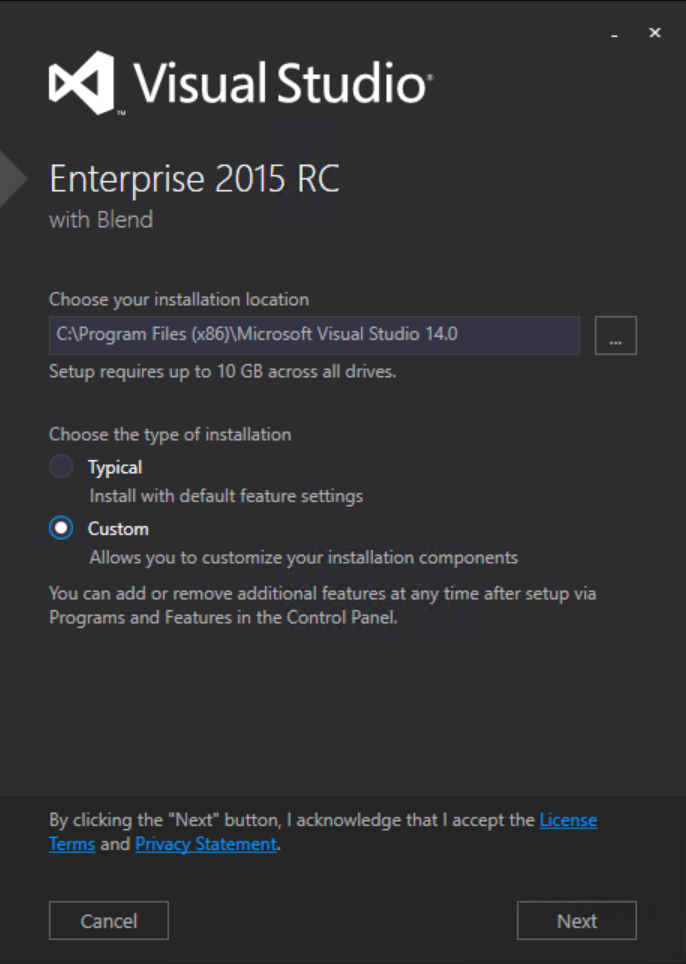
Set up Visual Studio by your standards, remember that each toolkit installed may add several gigabytes of utils and frameworks to your harddrive. In my EPiServer case the Web Developer Tools and GitHub Extension is enough. This may take a good 15 minutes depending on your computer and assigned resources.
Adding EPiServer NuGet repository and Extension
When done start up Visual Studio and add the EPiServer nuget repository
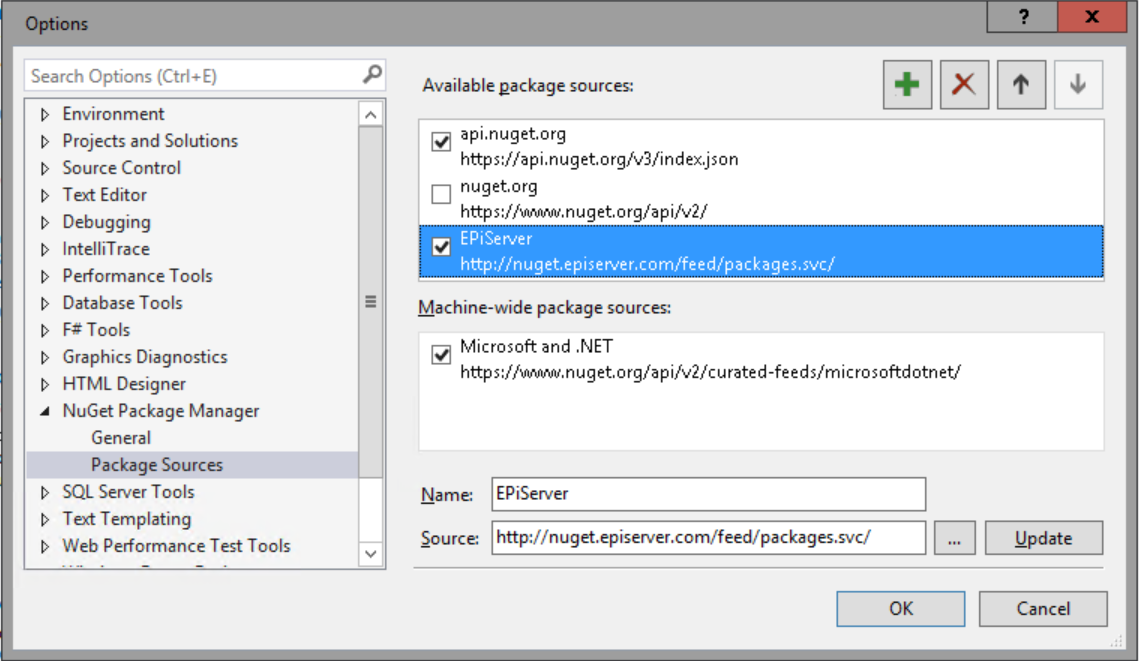
Add the EPiServer repository (Menu > Tools > Options > NuGet Package Manager) with Source address http://nuget.episerver.com/feed/packages.svc/
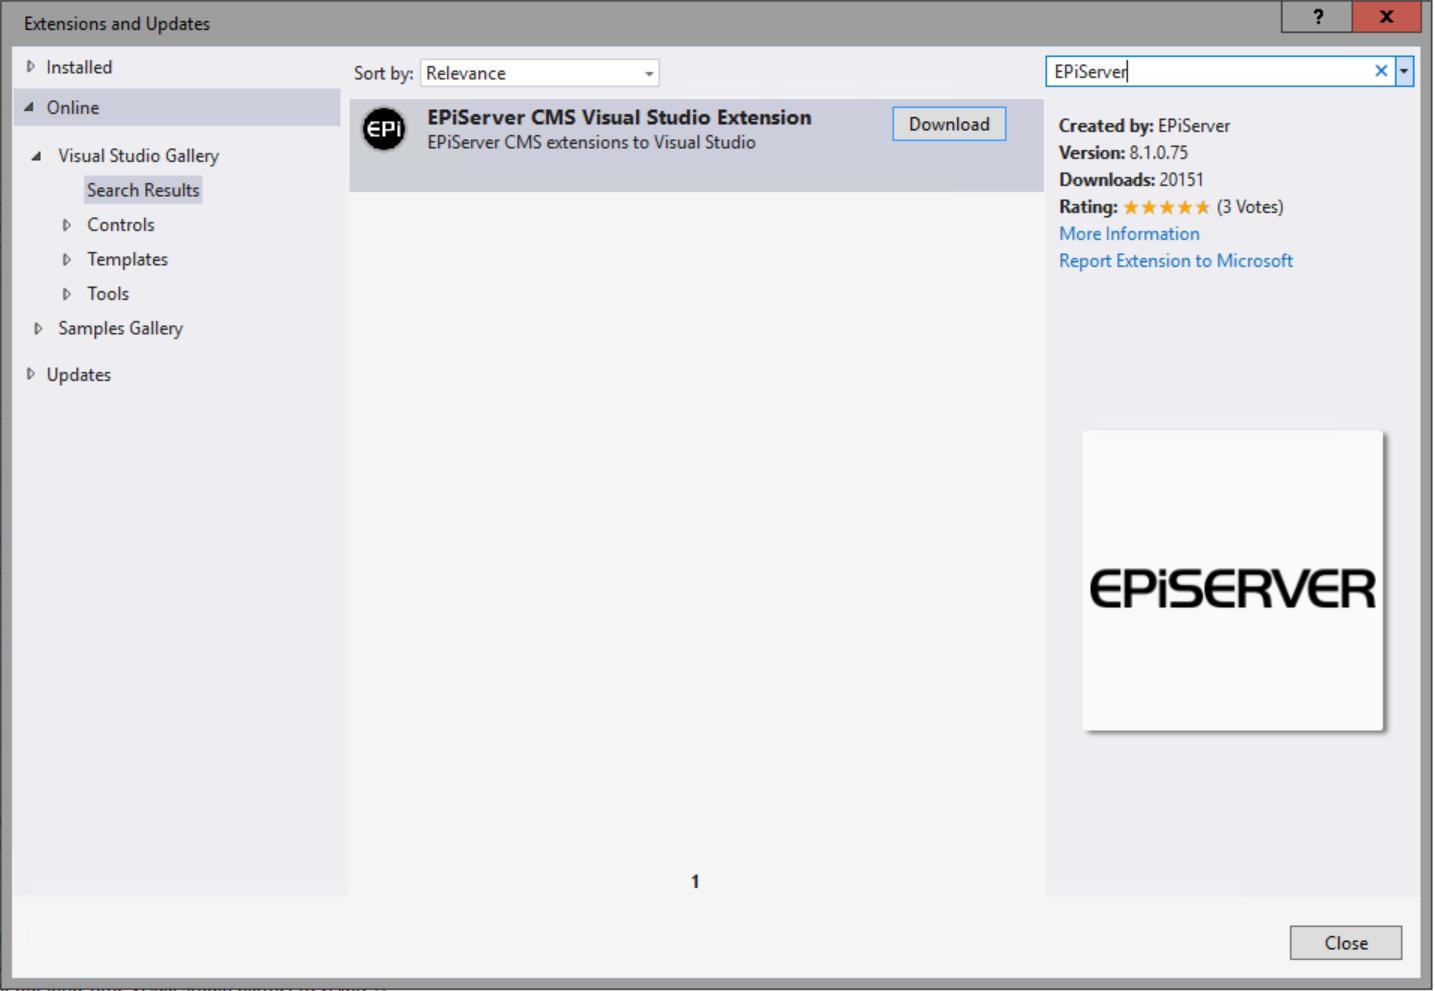
Install the EPiServer Visual Studio Extension (Menu > Tools > Extensions and Updates) and restart Visual Studio.
Setting up EPiServer 8 from scratch
This section describes how to set up an EPiServer 8 environment for development from scratch. Fundamentals and personal reflections on setting up a new EPiServer Project
- Use a folder in the disk root, like Repos or EPiServer. File names tend to become long and some versioning systems and packing utilities doesn't like long paths
- NEVER EVER implement Alloy unless you are in panic and need a demo site, always build your sites from scratch!
- STOP using WebForms, Microsoft has announced end of life with .NET 4.x for WF, future versions of .NET has zero support of WebForms
- DON'T send PageData objects directly to the views from the controllers, map them to view models (more on this later)
- DO NOT add complex mapping frameworks unless you are developing something really heavy duty, which 99% of all websites are not
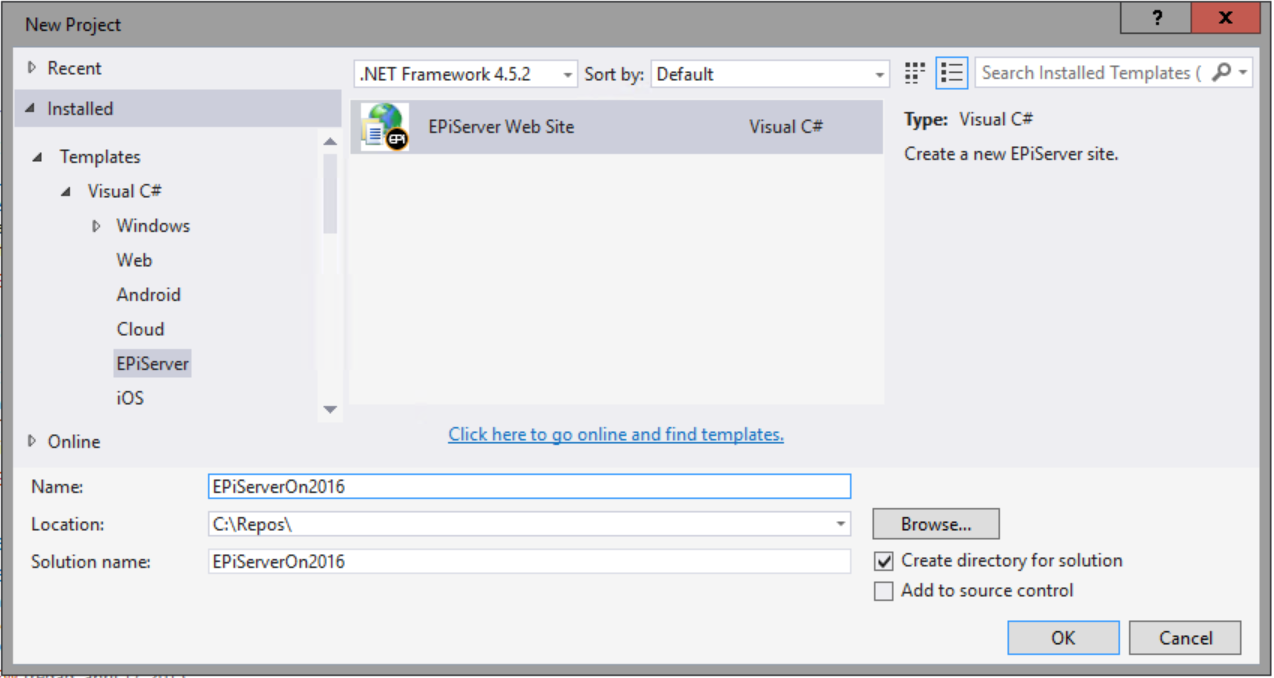
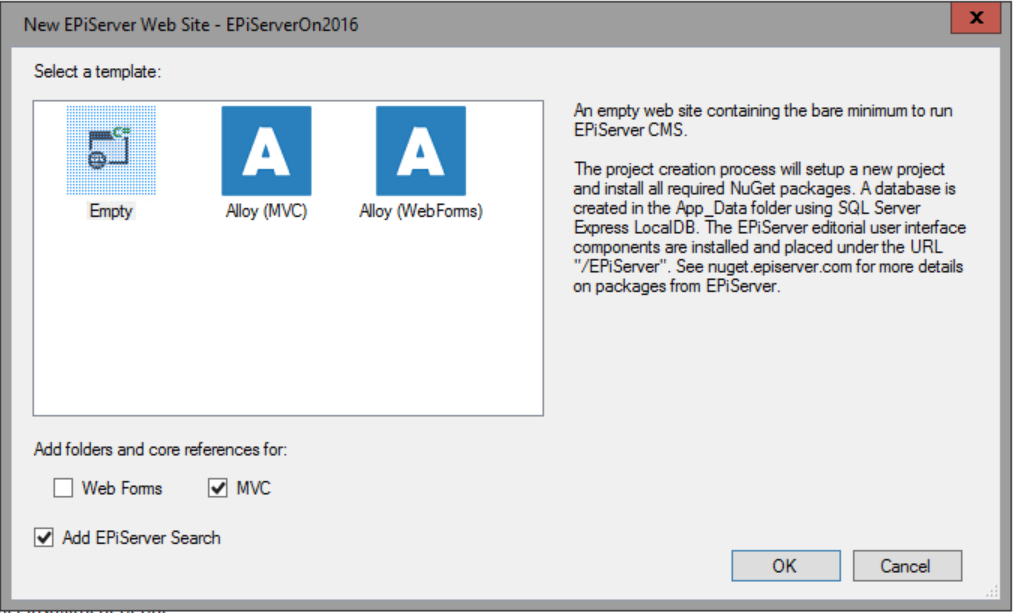 Use the Empty template!
Get the site working
Since this is a very basic tutorial we'll only create the start page and for this we will need
- PageData object (the data contract between our application and EPiServer)
- Controller
- ViewModel
- Views (Layout base page and View for the ViewModel)
PageData object (Page Type)
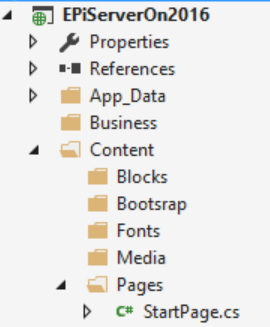
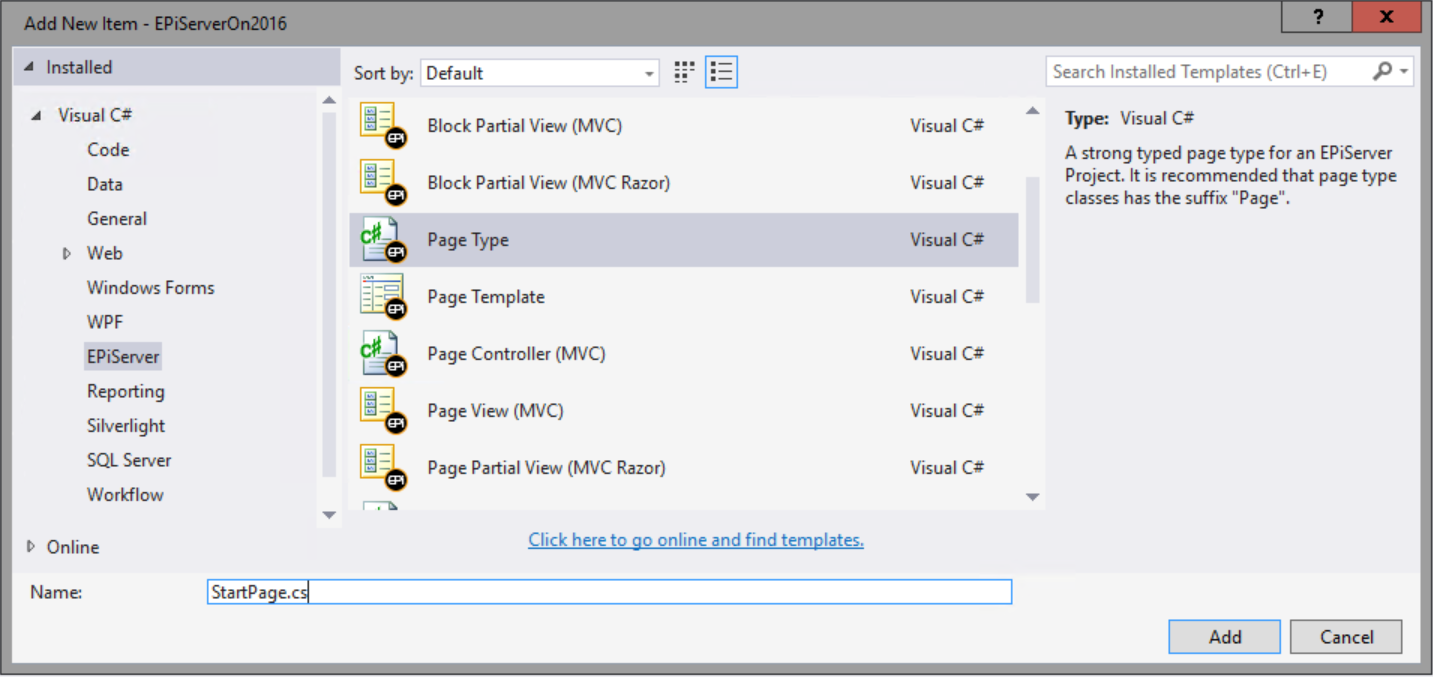
Begin by creating a structure for the PageData objects, in my case it will be Content > Pages. I recommend to use the pattern where you separate EPiServer Object Types into folders. Create a PageData object called StartPage, use the Page Type template in Visual Studio and add some properties
[ContentType(DisplayName = "Start page", GUID = "865cfb3d-a073-4820-8ddc-b55c1232a2f8", Description = "")]
public class StartPage : PageData
{
    [CultureSpecific]
    [Display(
        Name = "Start page heading",
        Description = "The heading of the start page, also used as meta title",
        GroupName = SystemTabNames.Content,
        Order = 10)]
    public virtual string Title { get; set; }

    [CultureSpecific]
    [Display(
        Name = "Main body",
        Description = "The main body will be shown in the main content area of the page, using the XHTML-editor you can insert for example text, images and tables.",
        GroupName = SystemTabNames.Content,
        Order = 20)]
    public virtual XhtmlString MainBody { get; set; }
}
Controller
Create a controller for the start page, use the Page Controller template 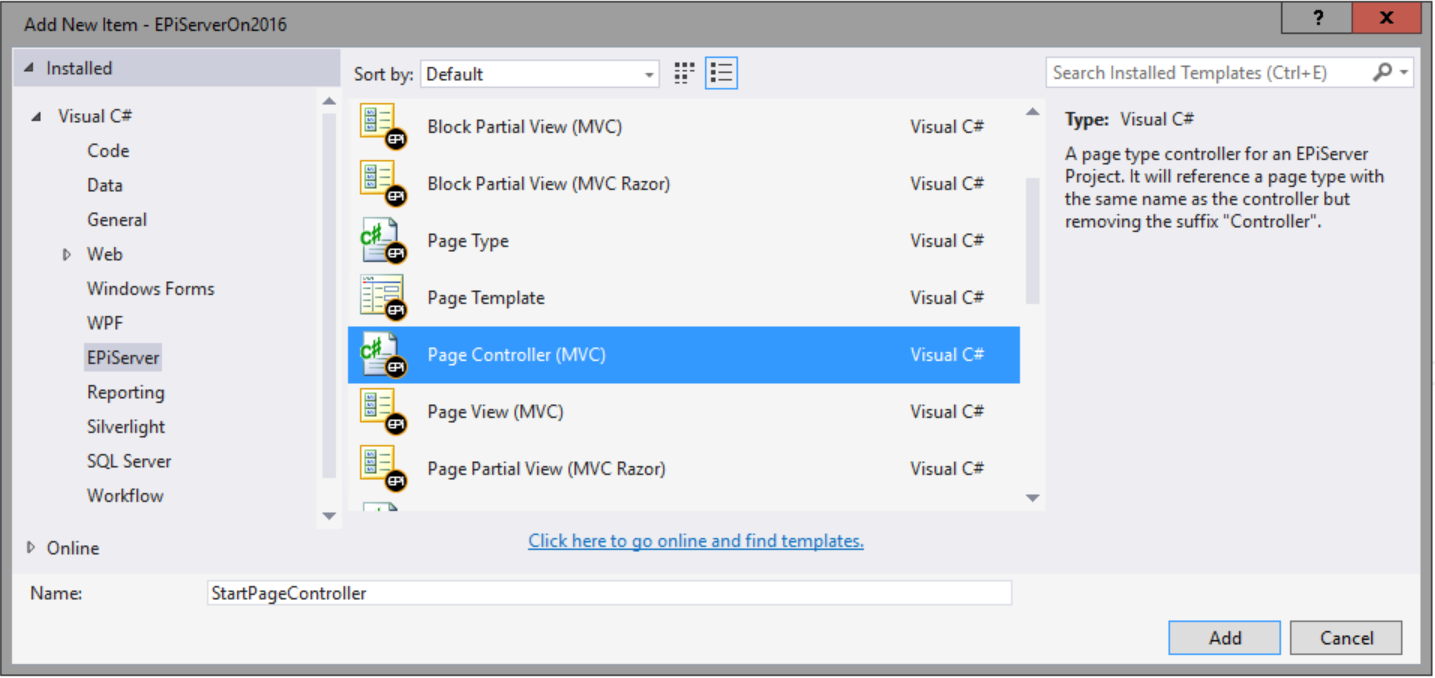
public class StartPageController : PageController
{
    public ActionResult Index(StartPage currentPage)
    {
        // Never pass the PageData object directly to the view!!!
        return View(currentPage);
    }
}
ViewModel
Since we don't want to expose the entire PageData object StartPage in the view we need to transfer the properties to a custom view model. Create it in the directory Models > Pages. 
Use an ordinary Class and name it StartPageIndexViewModel. This is a very useful pattern that gives us a lot of information on the object, lets read it backwards
- ViewModel – Aha, it is probably a view model
- Index – I'd say it belongs to the Index method of the controller
- StartPage – The name of the originating controller and/or PageData object.
Add the properties from the PageData object and extend it with a Changed DateTime property
public class StartPageIndexViewModel
{
    public string Title { get; internal set; }
    public XhtmlString MainBody { get; internal set; }
    public DateTime Changed { get; internal set; }
}

Change the StartPageController
public ActionResult Index(StartPage currentPage)
{
    var model = new StartPageIndexViewModel
    {
        Title = currentPage.Title,
        MainBody = currentPage.MainBody,
        Changed = currentPage.Changed
    };

    return View(model);
}
Layouts
Create a basic layout page in the Views > Shared folder called _Layout.cshtml and fill if with content of your preference, in my case I'll add some default meta fields and two sections called Meta and Content. I've also added the EPiServer Quick Navigator that will give logged in users a quick edit bar in the top right corner of the web browser.
<!DOCTYPE html>

<html lang="en">

<head>

    <meta charset="utf-8">

    <meta http-equiv="X-UA-Compatible" content="IE=edge">

    <meta name="viewport" content="width=device-width, initial-scale=1.0">

    @RenderSection("Meta", false)


    <!--[if lt IE 9]>

        <div class="old-browser">You are using an <strong>outdated</strong> browser. Please <a href="http://browsehappy.com/">upgrade your browser</a> to improve your experience.</div>

    <![endif]-->

    <title>@ViewBag.Title</title>

</head>

<body>

    <div class="container">

        <div class="page-content">

            @RenderSection("Content", false)

        </div>

    </div>

    <footer>

        @*Footer content*@

    </footer>

    @Html.RenderEPiServerQuickNavigator()

</body>

</html>
Now a matching view to the ViewModel I will create mine in the folder Views > Pages > StartPage and call it StartPageIndex.cshtml
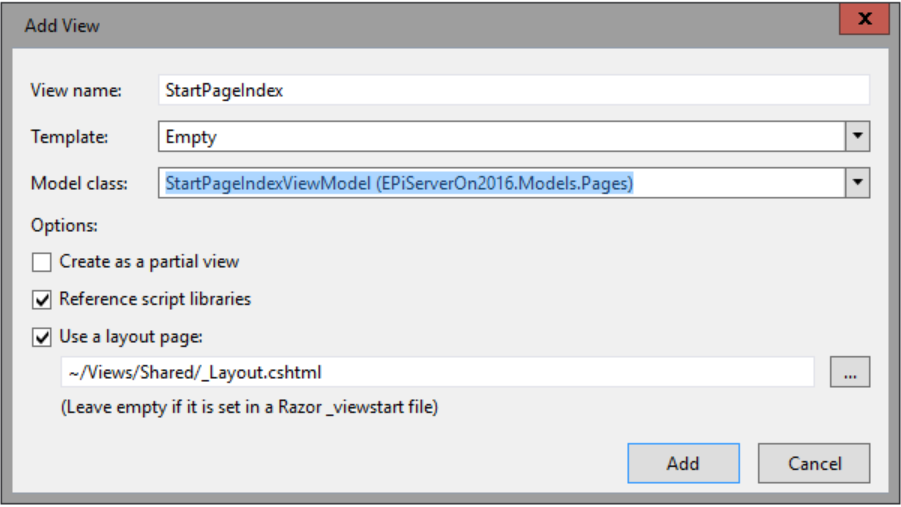
Create the view and modify it to look something like this
@model EPiServerOn2016.Models.Pages.StartPageIndexViewModel

@{

    Layout = "~/Views/Shared/_Layout.cshtml";

    ViewBag.Title = @Model.Title;

}


@section Meta {

}


@section Content{

    <h1>

        @Html.PropertyFor(m => m.Title)

    </h1>

    <div>

        @Html.PropertyFor(m => m.MainBody)

    </div>

    <div>

        <small>

            Last updated: @Model.Changed.ToString("yyyy-MM-dd")

        </small>

    </div>

}
We must also tell the controller where the view is since this isn't the standard pattern in MVC. Modify the return of the controller to look like this
return View("~/Views/Pages/StartPage/StartPageIndex.cshtml",model);
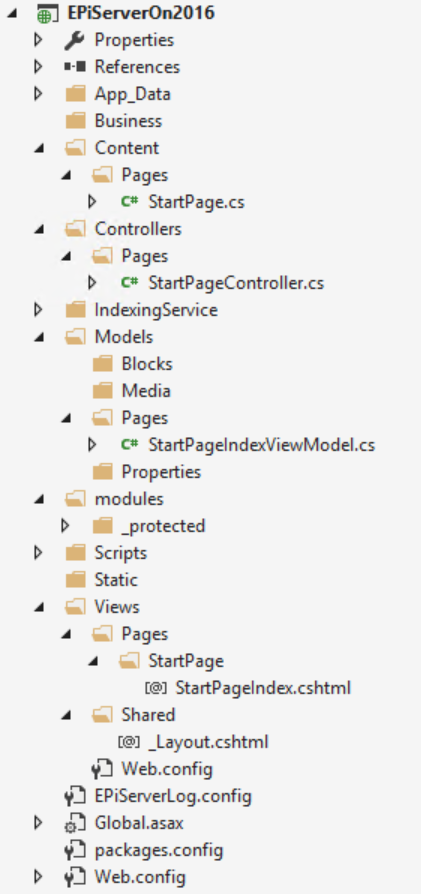
The complete project structure now looks like this
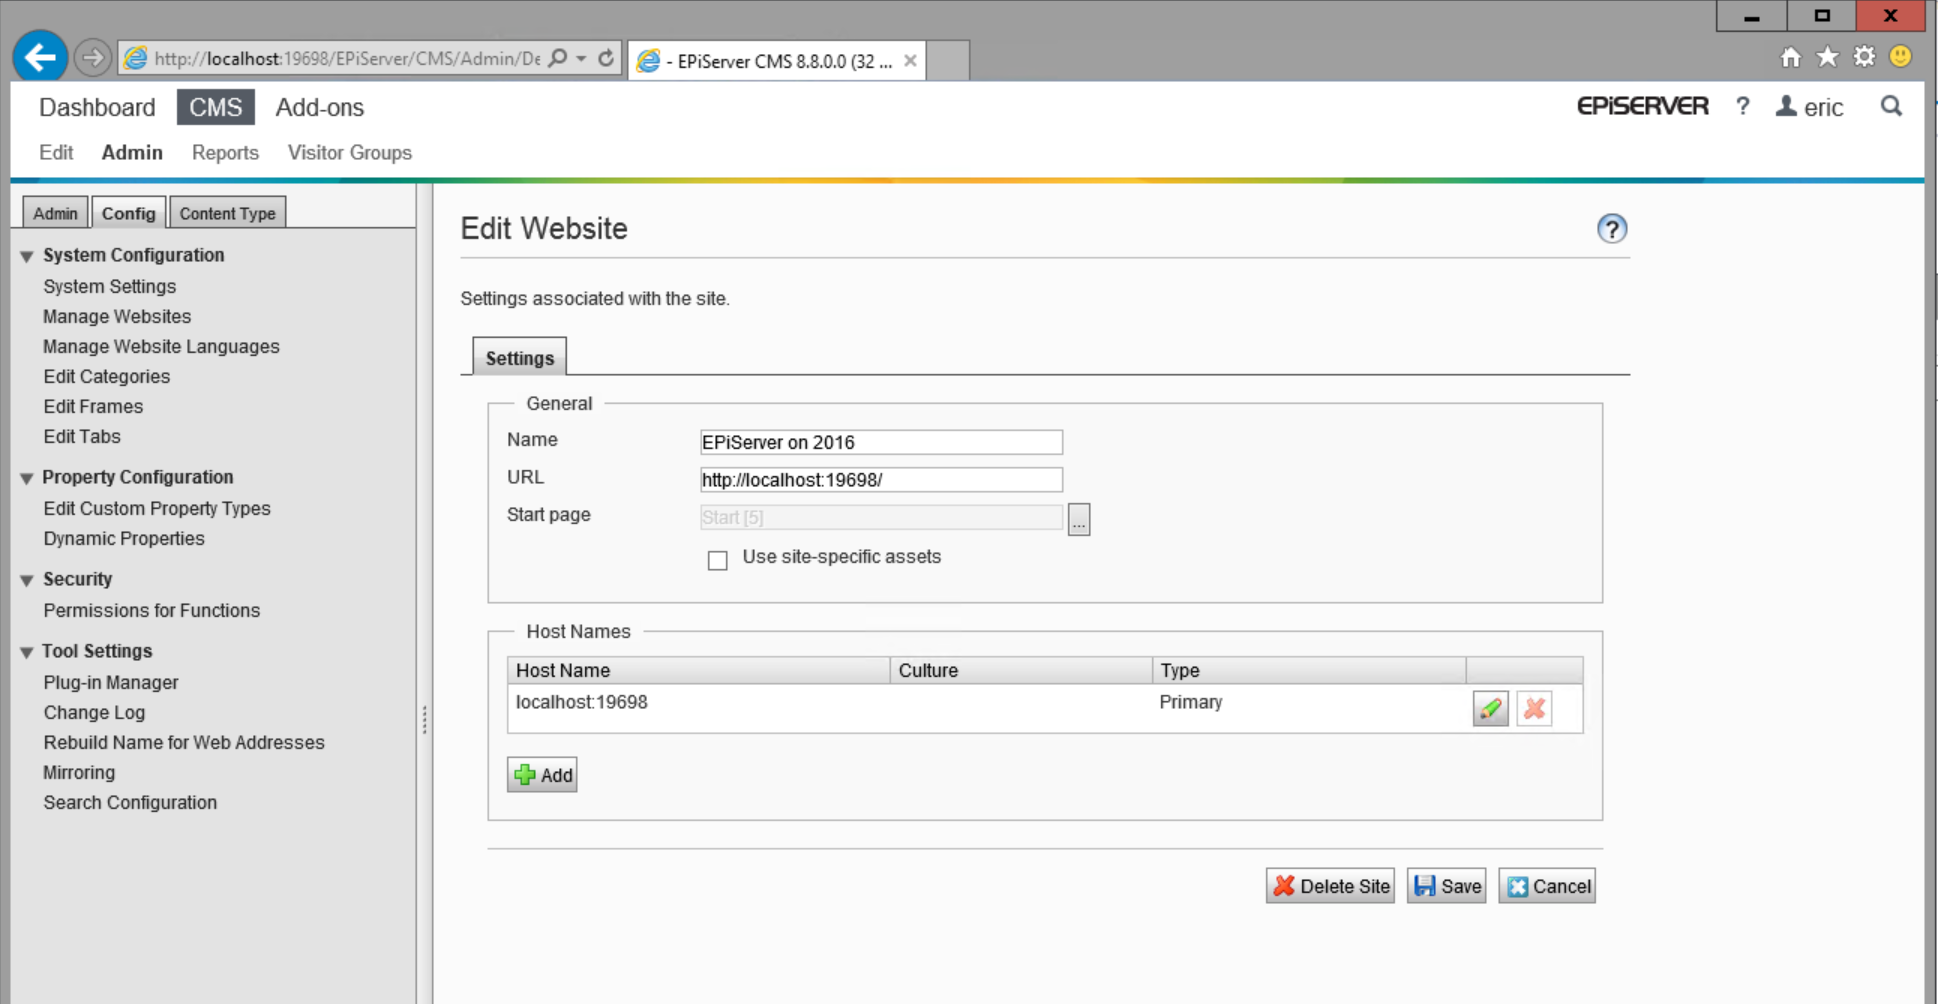
Configure the site
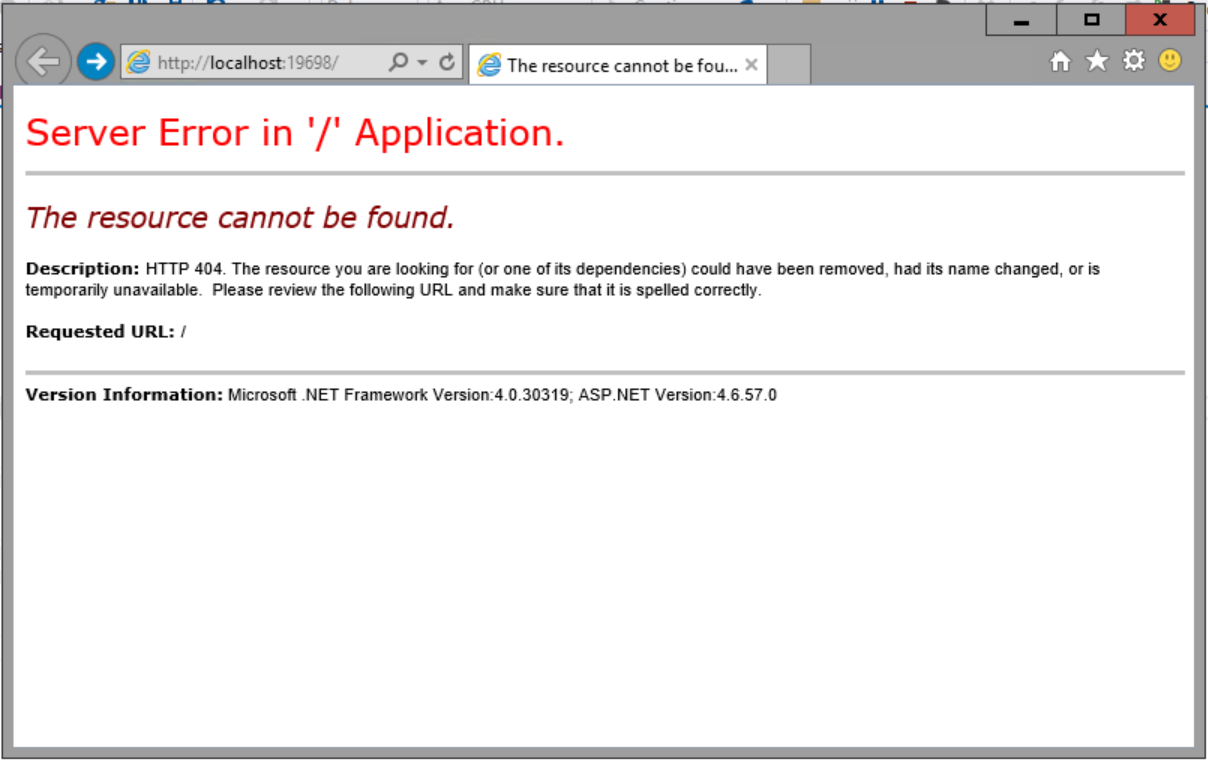
All actual coding to make the EPiServer 8 MVC site working is done, at this point we need create a start page and tell EPiServer that this is our landing page. Hit F5 and run the site, expect an error screen at first, this is normal. Add /episerver/cms to the path and logon, the account will typically be the user you are logged on to windows.
Add a new start page under the root element and give it some content, remember to publish the page :)
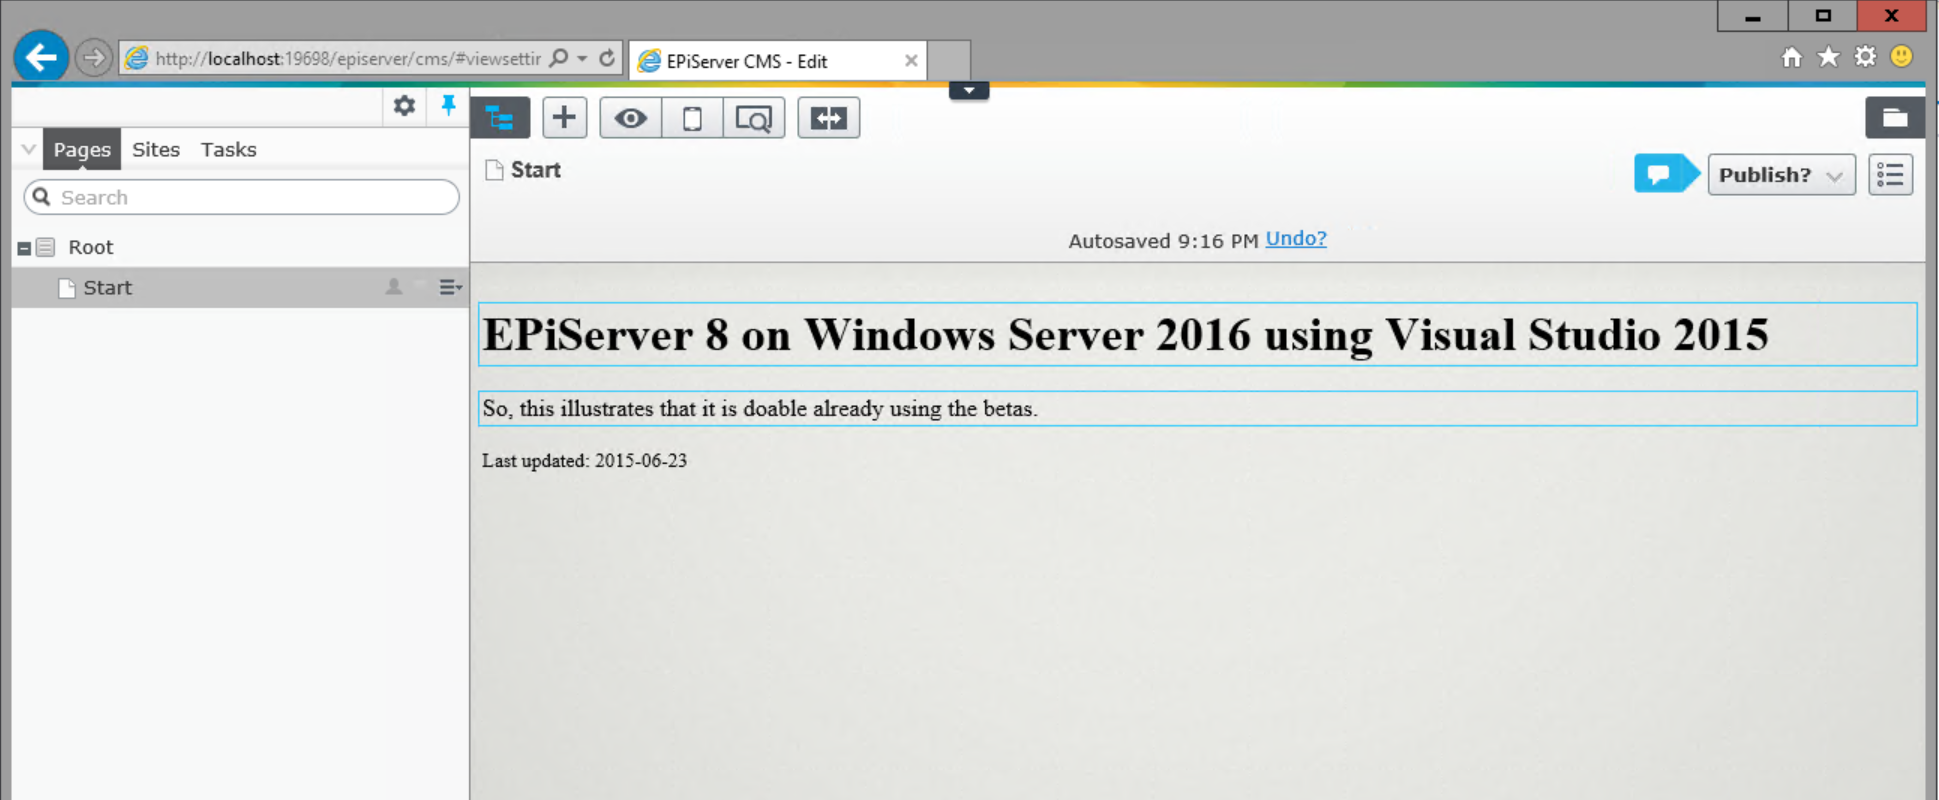
Assign this page as the start page in the admin GUI. Hit save and reload the site.
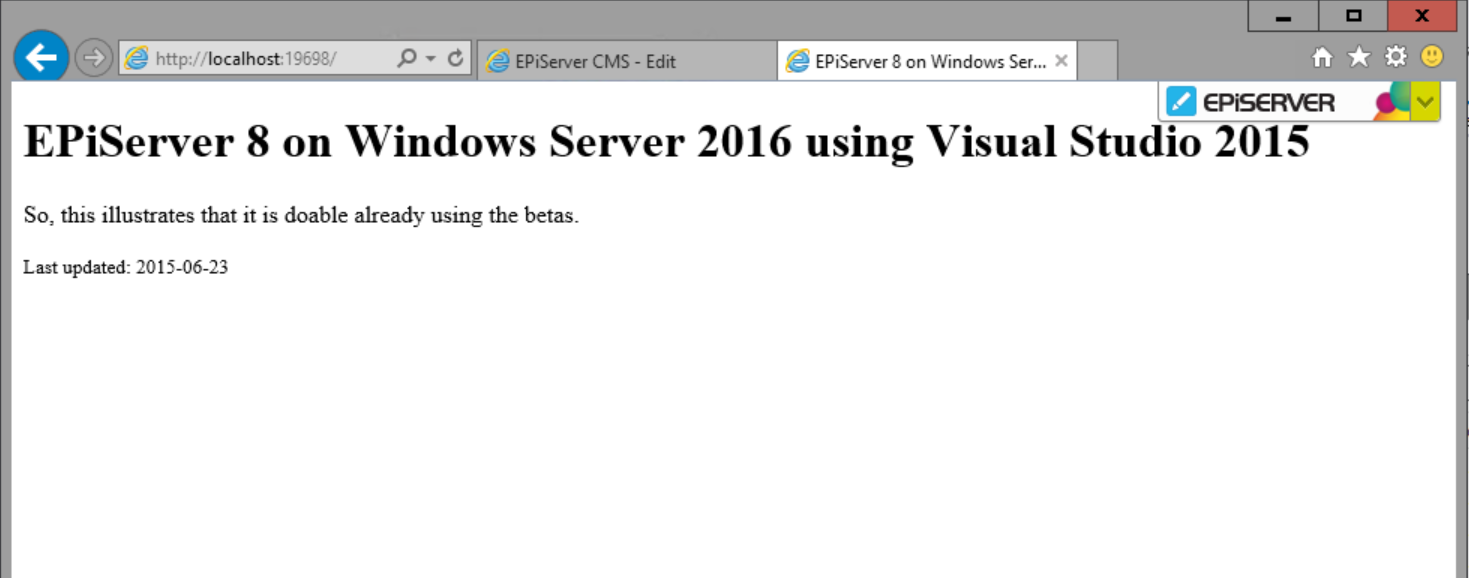
This was a very basic example showing there are little or no magic needed to make EPiServer 8 run on a Windows Server 2016 using Visual Studio 2015.